These Terms of Service (the "Terms") set out the conditions of access to and use of the Clean Mailbox service (the "Service"), provided by Camille Arpaillange, sole trader (EI), 258 Avenue de l'Hautil, 78955 Carrières-sous-Poissy, France, registered under number 53021905400026 (hereinafter "Clean Mailbox", "we", "us", "our").
By creating an account, activating a trial, adding a domain and/or using the Service, you (the "Customer" or "User") acknowledge that you have read and accepted these Terms.
Important: these Terms apply to both business and consumer Customers. Certain provisions (e.g. right of withdrawal, mediation) apply only to consumers.
1. Definitions
- Customer: the individual (consumer) or legal entity (business) subscribing to the Service.
- End User: any person using an email address attached to the Customer's Domain (e.g. an employee, association member, etc.).
- Domain: an internet domain name added to the Clean Mailbox interface and for which the Service is activated.
- Domain Administrator: a person with administration rights over the Domain in the Customer Interface (configuration, access to quarantines, unblocking, etc.).
- Blocked Email: an email detected and placed in quarantine/archived by the Service (spam, suspected phishing, malicious attachment, etc.).
- Customer Interface: the Clean Mailbox dashboard used to administer the Domain, rules, and actions on blocked emails.
- Trial Period: a free period (generally 30 days, unless otherwise agreed) allowing the Service to be tested.
2. Description of the Service
Clean Mailbox is an inbound email filtering service, primarily anti-spam and anti-virus, aimed at reducing spam, phishing attempts and malicious attachments for a Domain owned or controlled by the Customer.
The Service may in particular:
- analyze inbound emails (headers, sender/recipient, metadata, content and attachments depending on the detection mechanisms);
- block certain emails and retain a temporary copy of them;
- provide tools/reports enabling emails to be unblocked and rules to be adjusted.
The Service is provided on a best-effort basis (see Article 11).
3. Eligibility, account and information provided
3.1. Account creation
To use the Service, you must create an account via the Customer Interface (or via a link provided) and supply accurate information (first name, last name, email, company where applicable, etc.).
3.2. Legal age / capacity
You represent that you are of legal age and have the legal capacity to enter into a contract. If you are a minor, you must obtain authorization from your legal guardian.
3.3. Security of credentials
You are responsible for keeping your credentials confidential. Any action carried out from your account is deemed to have been carried out by you. You agree to notify us without delay in the event of unauthorized access.
4. Activation of the Service – Domain – Trial Period
4.1. Activation per Domain
The Service is subscribed to and (where applicable) billed per Domain (depending on the plan). The Customer represents that it holds the rights necessary over the Domain.
4.2. Start of the Trial Period
Unless otherwise stated in the commercial offer, the Trial Period begins when the Customer:
- adds the Domain to the Customer Interface, and/or
- carries out the technical actions requested for activation (e.g. changes to DNS/MX records), depending on the integration method used.
4.3. Technical configuration
The Customer is responsible for:
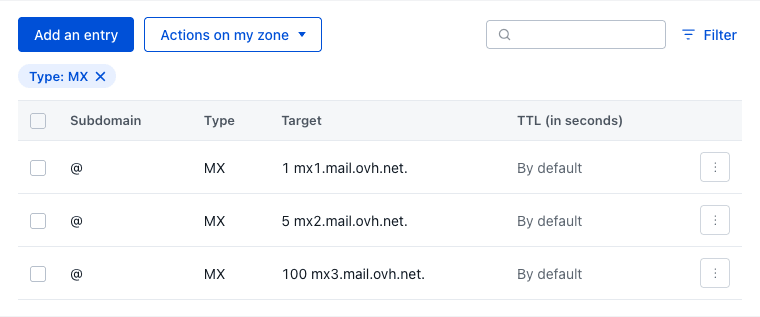
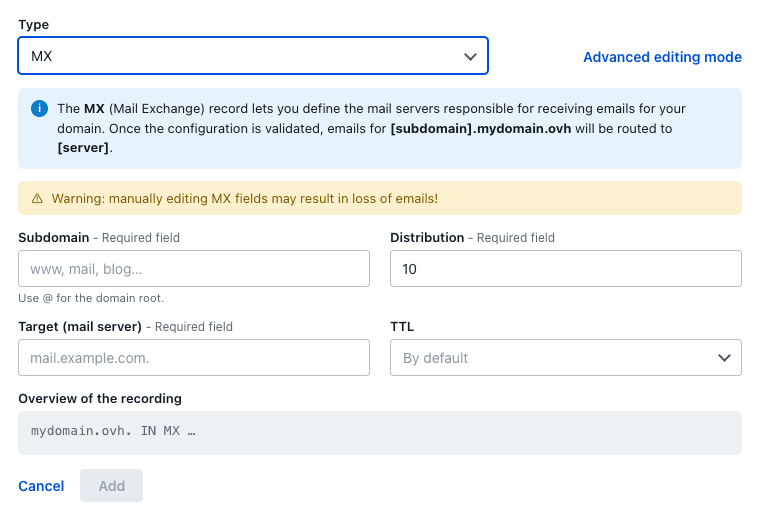
- configuring its Domain (e.g. DNS/MX, SPF/DKIM/DMARC where applicable) when necessary;
- the compatibility of its email environment;
- checking the effects of filtering (including the risk of false positives).
In the event of a critical incident, the Customer may deactivate the Service for its Domain by reverting to its previous configuration (e.g. changing the MX records), at its own risk.
5. How filtering, quarantine and unblocking work
5.1. Detection and blocking
Inbound emails may be automatically assessed. Certain emails may be blocked due to suspected spam, phishing, spoofing, malware, or content deemed dangerous.
5.2. Retention of Blocked Emails (quarantine / archive)
Clean Mailbox retains a copy of Blocked Emails for a period depending on the plan, up to a maximum of thirty (30) days.
Upon expiry of this period, Blocked Emails are deleted from our systems, subject to:
- legal obligations,
- and/or reasonable, strictly time-limited technical backup/rotation constraints.
5.3. Access to Blocked Emails (Domain Administrator scope)
During the retention period applicable to the plan (up to a maximum of thirty (30) days), the Domain Administrator has access, via the Customer Interface, to all Blocked Emails attached to the Domain, which may include viewing:
- metadata (sender, recipient, subject, timestamp, etc.);
- the message body;
- and attachments (if retained as part of the blocking).
This access is not limited to individually named mailboxes and may cover, in particular, emails addressed to:
- Users (individual mailboxes),
- aliases,
- generic addresses (e.g. contact@, support@),
- mailing lists, groups,
- forwarding/redirection systems,
- and more generally any address or receiving configuration attached to the Domain.
The Customer (and/or the Domain Administrator) is responsible for the use of this access, in particular vis-à-vis End Users, and agrees to comply with the applicable legal framework (including confidentiality and, where applicable, the secrecy of correspondence). In this respect, the Customer specifically undertakes to inform End Users attached to the Domain of the existence of the filtering system and of the terms under which the Domain Administrator can access Blocked Emails, using whatever means it deems appropriate (IT charter, internal policy, individual notice, etc.).
Clean Mailbox, acting as Processor for business Customers, only accesses Blocked Emails to the extent strictly necessary to provide the Service, for technical maintenance, security, or support, on the Customer's instructions and in compliance with the GDPR.
5.4. Unblocking an email
Depending on the configuration and rights granted:
- the Domain Administrator can unblock a Blocked Email;
- the End User recipient may also be able to unblock a Blocked Email if this option is enabled.
The Customer acknowledges that unblocking an email may expose its system to a risk (malware, fraud, phishing). The Customer and/or the End User remain(s) responsible for unblocking decisions.
5.5. False positives / false negatives
The Customer acknowledges that any filtering system can produce:
- false positives (a legitimate email is blocked);
- false negatives (an unwanted email is not blocked).
The Service aims to reduce these risks, without any guarantee that they will be eliminated entirely.
6. Rules of use – Prohibitions
You agree not to use the Service:
- in a manner contrary to applicable laws or regulations;
- to compromise the security of others, attempt to access third-party systems, or facilitate fraudulent activity;
- to send or relay spam, phishing, or malware;
- in violation of third-party rights (intellectual property, personal data, confidentiality, secrecy of correspondence, etc.).
We may suspend the Service in the event of manifestly unlawful or dangerous use (see Article 12).
7. Commercial terms – quotes – trial – conversion to a paid plan
7.1. Subscription (process)
Subscription is generally arranged via a quote and/or email exchange (rather than self-service). The terms (scope, price, trial duration, retention, options) are set out in the commercial offer.
7.2. Free, no-commitment Trial Period
Unless otherwise agreed, a free Trial Period is offered (often 30 days). During the trial:
- the Service is accessible within the defined scope,
- no subscription fees are due.
7.3. Conversion to a paid plan only after explicit agreement
Conversion to a paid subscription only takes place after the Customer's explicit agreement, evidenced for example by:
- acceptance/signature of a quote,
- written confirmation by email,
- or equivalent explicit confirmation.
In the absence of explicit agreement, the trial may end at its term and/or the Service may be deactivated.
8. Price – billing – payment – renewal
8.1. Price and billing frequency
Prices, features and retention periods are described on our commercial pages, in the quote and/or offer summary. Billing is monthly or annual depending on the plan chosen.
8.2. Automatic renewal
Unless otherwise stated in the offer, the subscription is automatically renewed:
- for monthly plans: renewed at the end of each monthly period,
- for annual plans: renewed at the end of each annual period.
For annual subscriptions, we generally send a reminder between 30 and 60 days before the renewal date, provided contact details are up to date and email deliverability allows it.
The Service has no minimum commitment period: the Customer may cancel at any time to prevent this automatic renewal, under the conditions and time limits set out in Article 12.1.
8.3. Payment
A valid payment method may be required to activate a paid subscription. Payments are processed by our providers Stripe and GoCardless, which are PCI-DSS compliant. We do not store card data (or only store it partially, depending on the mechanisms used by these providers).
8.4. Late payment / payment default
In the event of payment default, we may suspend access to the Service after notice and a reasonable period, and then terminate it in accordance with Article 12.
9. Right of withdrawal (consumer Customers only)
9.1. Principle
If you are a consumer and the contract was concluded remotely, you may benefit from a fourteen (14) day right of withdrawal, in accordance with applicable law, subject to legal exceptions.
9.2. Practical effect with the Trial Period
Where the Service is provided under a free Trial Period, withdrawal generally does not result in any subscription payment (since the paid subscription only begins after explicit agreement).
9.3. Paid subscription starting before the end of the withdrawal period
If, at the consumer Customer's request, performance of the paid subscription begins before the end of the withdrawal period, applicable legal rules may provide for:
- either pro-rata billing for the service actually provided up to withdrawal,
- or, in certain cases, loss of the right of withdrawal (in particular for certain digital content/services), subject to the conditions laid down by law.
In practice: these points are confirmed at the time of conversion to a paid plan (quote/confirmation), so as to be consistent with the actual situation.
10. Personal data (GDPR) – roles and processing
10.1. Principle
As part of filtering, Clean Mailbox processes personal data (e.g. sender/recipient email addresses, metadata, and potentially the content of blocked emails).
10.2. Allocation of roles
- Business Customer (B2B): as a general rule, the Customer is the Controller and Clean Mailbox acts as Processor for filtering the Domain's emails.
- Consumer Customer (B2C): Clean Mailbox processes the data necessary for account management and operation of the Service. Depending on use, certain processing may be carried out on the Customer's behalf (in a manner similar to processing on instructions), while complying with the applicable GDPR framework.
10.3. Data processing agreement (DPA)
For business Customers acting as Controller, a data processing agreement (DPA), compliant with Article 28 of the GDPR, is made available before or at the time of subscription and forms an integral part of the contractual relationship. It describes, in particular: purposes, duration, nature of the data, categories of data subjects, security measures, sub-processors, assistance, and the respective obligations of the parties.
10.4. Retention periods
- Account data: retained for the duration of the contractual relationship, then archived/deleted in accordance with legal obligations.
- Blocked emails: retained according to plan, maximum 30 days (Article 5.2).
10.5. Location
Processing is carried out in Europe, on the infrastructure of several hosting providers, all operating from regions located within the European Union. Details of sub-processors and applicable safeguards are set out in the privacy policy and, for business Customers, in the DPA.
10.6. Exercising your rights
The procedures for exercising your rights (access, rectification, erasure, objection, restriction) are detailed in the privacy policy.
Contact: [email protected]
11. Availability – Best effort – maintenance – support
11.1. Best effort
The Service is provided on a best-effort basis: we use reasonable means to ensure availability, performance and security, without any guarantee of uninterrupted operation or perfect detection.
11.2. Maintenance
Maintenance operations (planned or urgent) may cause temporary interruptions. Where possible, we will notify the Customer in advance.
11.3. Support
Support is available by email and/or ticket. Response times depend on the plan subscribed to and the criticality of the issue.
11.4. No SLA
No guaranteed service level (SLA) applies by default, unless expressly stated otherwise in a quote or specific commercial offer.
12. Suspension – termination
In summary: the Service has no minimum commitment period, for either party. The Customer may cancel at any time, provided that any period already begun remains payable in full. Clean Mailbox, operated by a sole trader, may likewise decide to end the Service at any time, for any reason.
12.1. Termination by the Customer
The Customer may terminate at any time, with no minimum commitment period, by contacting support (or via the Customer Interface if available). Termination ends the automatic renewal of the subscription, but does not give rise to any refund of the current period: any monthly or annual period already begun is payable in full.
For termination to prevent billing of the following period, it must be notified:
- for a monthly subscription: before the end of the current month, i.e. before the next monthly renewal date;
- for an annual subscription: before the renewal date (annual due date).
Absent termination notified within these time limits, the following period is billed and payable in full, with no pro-rata refund.
12.2. Termination by Clean Mailbox
Clean Mailbox is operated by a sole trader. As such, and irrespective of any breach by the Customer, Clean Mailbox may decide to end the Service at any time and for any reason (including, without limitation: cessation of business, strategic decision, inability to continue operating the Service), by notifying the Customer.
In this case, except in cases of urgency or impossibility, the Service will continue to be provided at least until the end of the period already billed and paid for (current month or year). If the Service ends before the end of that period, the unused portion of the period paid for will be refunded to the Customer on a pro-rata basis.
12.3. Suspension / termination by Clean Mailbox for breach
We may also suspend or terminate the Service, after notice where possible, in particular in the event of:
- breach of these Terms;
- a security risk, abuse, or unlawful activity;
- payment default;
- harm to the stability of the infrastructure.
In these cases, no refund of the current period is due.
12.4. Consequences
After termination/suspension:
- the Service may stop filtering the Domain's emails (the Customer must restore its usual receiving configuration, e.g. MX records, to avoid disruption);
- blocked emails still retained will be deleted in accordance with the retention cycles (max. 30 days) unless a legal obligation requires otherwise.
12.5. Data export
The Service does not currently provide a feature for exporting the Customer's configuration (filtering rules, whitelists/blacklists, settings) upon termination. Customers wishing to keep a record of their configuration must make a copy by their own means before termination.
13. Liability – limitations
13.1. General limits
The Customer uses the Service at its own risk. To the extent permitted by law, Clean Mailbox shall not be liable for indirect damages (loss of opportunity, loss of business, loss of data, commercial harm, etc.).
13.2. Risks inherent to email
The Customer acknowledges that email carries inherent risks (phishing, spoofing, malware). The Service reduces certain risks but cannot eliminate them entirely.
13.3. Liability cap
Except in the case of gross negligence, and to the extent permitted by law, Clean Mailbox's total liability is limited to the amount actually paid by the Customer for the Service over the last month of subscription (or, for annual subscriptions, the corresponding monthly pro-rata amount).
13.4. Consumers
Nothing in these Terms limits the mandatory rights of consumers.
14. Force majeure
Clean Mailbox shall not be liable for any delay or failure to perform its obligations resulting from an event of force majeure, within the meaning of Article 1218 of the French Civil Code, including but not limited to: natural disaster, fire, failure or interruption of telecommunications or electricity networks, failure of a third-party hosting or infrastructure provider, large-scale cyberattack, decision by a public authority, strike, or any other event beyond Clean Mailbox's reasonable control.
In such a case, performance of the obligations concerned is suspended for the duration of the event. If it continues beyond a reasonable period, either party may terminate the contract without compensation.
15. Intellectual property
The Service, its software, trademarks, interfaces, content and documentation are protected. These Terms do not transfer any intellectual property rights. The Customer has a non-exclusive, non-transferable right of use for the duration of the contract.
16. Telephone canvassing (Bloctel)
If you provide us with a phone number, you may register on the French opt-out list against telephone canvassing: https://www.bloctel.gouv.fr/.
We do not, as a matter of practice, carry out telephone canvassing, except upon request or within the context of a contractual relationship.
17. Mediation (consumers) – dispute resolution
17.1. Amicable resolution
In the event of a dispute, the parties will first seek an amicable solution by contacting support: [email protected].
17.2. Consumer mediation
In accordance with the provisions of the French Consumer Code on consumer dispute mediation, if you are a consumer and have not received a satisfactory response after contacting us, you may make free use of a consumer mediation procedure with:
CM2C
49 rue de Ponthieu
75008 Paris, France
Phone: +33 1 89 47 00 14
Website: https://www.cm2c.net/declarer-un-litige.php
Email: [email protected]
18. Changes to these Terms
We may amend these Terms at any time. In the event of a material change, Customers will be notified by email and/or via the Customer Interface. Use of the Service after the new Terms take effect constitutes acceptance of them.
19. Assignment of the contract
The Provider may assign or transfer this contract, in whole or in part, as a matter of right, to any company that takes over its business, in particular in the event of a change in legal form (e.g. conversion of the sole trader business into a company), merger, partial contribution of assets, or transfer of the business, subject to notifying the Customer. The Customer may not assign the contract, in whole or in part, without Clean Mailbox's prior written consent.
20. Governing law – jurisdiction
20.1. Governing law
These Terms are governed by French law.
20.2. Disputes
In the event of a dispute, jurisdiction will depend on the Customer's status (business/consumer) and the applicable legal rules.
21. Contact
Support / questions: [email protected]
Address: 258 Avenue de l'Hautil, 78955 Carrières-sous-Poissy, France
Data protection contact: [email protected]
22. Reference language
These Terms are drafted in French. An English version is made available for information purposes for non-French-speaking Customers. In the event of any discrepancy or difficulty of interpretation between the French version and the English version, the French version shall prevail.
Last updated: 24 July 2026.